
Contents
3D printing technology plays an increasingly important role in the development of new custom tool water cups. The 3D printing prototype can make the new water cup investors and R&D engineers not have to wait for the mold to be completed to discover the defects of design, thus saving the time and cost of R&D.
In order to facilitate your understanding, as the one-stop drink bottle cup manufacturing service provider, KingStar shares the basic knowledge of 3D printing and the general process of new water cup development. Just scroll down and let’s learn something together!
I. What is 3D Printing Prototype
3D printing, also known as additive production, is a term that refers to a series of processes used to manufacture 3D objects, usually prototypes. 3D printing is achieved through the combined efforts of machines, computers and computer-aided design (CAD) programs. Often used to develop templates for specific printing tasks, the program does the heavy lifting of sketching out a virtual design and then physically creating it. Before printing, the engineer needs to send the stp or step format drawings of drink bottle/tumbler/mug/cup/bowl to the 3D printer.
3D printing is one of the promising solutions for creating high-quality prototypes. At KingStar, you don’t need to prepare 3D drawings yourself, our R&D team will do it for you.
II. Advantages of 3D Printing Prototypes
In the previous part KingStar has shown some background knowledge about 3D printing, and in this part we will lay our focus on presenting the advantages of adopting 3D printing prototype in your water bottle development project.
Create Various Iterations
Compared with other production techniques, 3D printing is capable of offering the most intuitive effects. 3D printing makes full use of 3D modeling software to create a digital 3D model before materializing it with the authentic material. No matter how intricate the drinkware or the accessory is, a 3D printer can generate a vivid duplicate of it in a comparatively short period of time.
In the process of new product development, KingStar chose to use 3D printing technology to print the water cup prototype because it is very convenient and does not require repeated production of expensive molds. The birth of the final product is expected to undergo round after round of adjustments, which is undoubtedly a considerable expense. And with the help of 3D printing technology, we can actually feel the real size of the product before the official opening of the mold, and try whether it can fit the cup holder.
Save money
As we have implied in the above part, additive manufacturing is comparatively cheaper than traditional production techniques like injection molding.
When we adopt injection molding to create a prototype, we must make a mold to see the exact performance. And it is the mold that consumes the majority of the budget. However, when it comes to 3D printing, we don’t need to make a mold as the printed object can vividly present every detail of the three-dimensional prototype. The success of your water bottle business is restricted by time and money, and that’s why the significance of applying 3D printing in checking the tooling should never be ignored.
Save time
Again, compared to traditional production techniques such as injection molding, 3D printing is faster with more iterations of lower costs. This advanced technology, perfect for prototyping, allows operators to skips complicated operating steps, eventually accelerating the development of clients’ dreaming products.

III. Custom Tool Bottle Cup Development Process & 3D Printed Prototype Samples
Custom mold tooling bottle cup development procedure normally as below.
- Client sends RFQ (request for quotation)
- KingStar signs NDA
- KingStar receives drawing and release Design for Manufacturing
- Client updates the drawing accordingly if necessary
- KingStar releases quotation
- Client confirms pricing and payment terms
- Client places order and pay deposit
- KingStar sends out 3D printing prototype sample to client for approval
- KingStar starts tooling production
- Tooling completion
- KingStar sends out 1st shot sample to clients for checking
- Client releases comments on 1st shot sample
- 2nd shot sample (T2 sample) ready
- Client provides artwork for packaging
- KingStar send 2nd shot(T2) samples, complete packaging samples to clients for final approval
- Sample approval
- Pilot run
- Production start
- Production finish
- Shipping
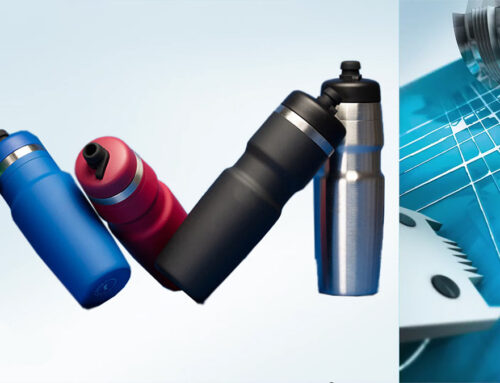
Making prototype is one of the most vital step in the development of a product.
For example, we make a water bottle prototype on the basis of your drawing and then deliver that printed prototype to you for inspection and approval. If you feel satisfied and confirm the standards of it, then we can start tooling manufacturing. But, if you think the printed sample does not 100% reflect your product idea, you can ask for update the drawing and remaking prototype.
This impressive technology also help you better spot flaws, saving potential losses that would have been found in mass production. Therefore, it is undeniable that we need to apply this technology to make prototypes considering all the above advantages. And just as we have emphasized, 3D printing prototype has become an indispensable part of product development in nearly every field.

IV. Before & After 3D Printing Prototype
- Before 3D Printing Prototype
Before making water bottle prototype with 3D printing, you are advised to send us the 3D design file (step or step format is welcomed) or CAD drawing. You can ask for your design team to put your idea onto the drawing/file. However, if you just hold an idea about new water bottles yet without a clear drawing, don’t give up, instead, you can contact us and our unbelievable design team will then take the job for you. Keeping exchanging ideas and we will together make a difference!
- After 3D Printing Prototype
Once the manufacturing of the 3D printing prototype is completed, we will send it to you for checking. If you think it is okay, then we will launch tooling, if not, we will assist you to update the 3D drawing as per your advice and then resend the 3D printed prototype to you again for approval.
If the prototype is approved, we will start tooling manufacturing and send you our T1 sample made in our molds. In general, we will later release T2 sample on the basis of your requirements on T1 sample. And if you are quite satisfied with our T2 sample, we will eventually launch the mass production.
Mr. Samuel Liu is Senior Research&Development Engineer of KingStar Industries Co., Ltd. Please feel feel to send email to info@waterbottle.tech if you want to talk with him on technology and manufacturing.