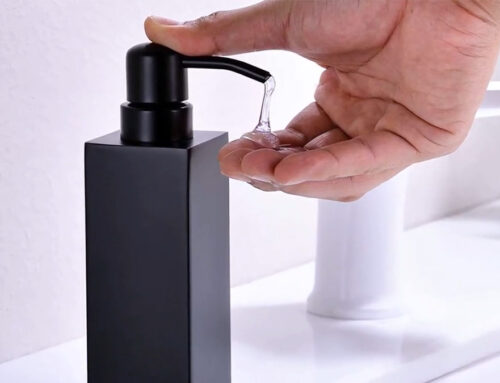

Stainless steel soap dispensers are functional and stylish accessories to both commercial and residential settings. But over time, soap residue, hard water stains, and even fingerprints can make it sticky, grimy, and clogged. So it needs regular cleaning and maintenance to stay in good shape. As the leading expert in wholesale custom metal dispenser manufacturing, KingStar will give you a quick guide to proper soap dispenser cleaning and maintenance.
Why Regular Cleaning Is Crucial for a Stainless Steel Soap Dispenser
1. Prevent Soap Buildup and Clogging
Over time, liquid soap can thicken, dry out, or leave behind sticky residue. This buildup can cause the dispenser to clog, making it hard to dispense soap smoothly. Regular cleaning helps prevent blockages and ensures consistent flow.
2. Maintain the Stainless Steel Finish
Although stainless steel is rust-resistant, it’s not completely immune to stains. Fingerprints, water spots, and soap scum can make the dispenser look dull. Regular cleaning preserves the dispenser’s sleek, polished look.
3. Stop Bacterial Growth
Soap dispensers are touched multiple times a day, often with wet or dirty hands. If not cleaned, bacteria can grow on the pump or around the nozzle. Wiping and disinfecting the dispenser keeps it safe and sanitary.
4. Extend Its Lifespan
A well-maintained stainless steel soap dispenser can last for years. Cleaning removes corrosive substances that could damage internal parts or the steel surface over time.
5. Keep the Soap Fresh
Old soap residues can alter the scent or color of fresh refills. Regular rinsing prevents contamination and ensures that each pump delivers clean, fresh soap.
Tools You’ll Need for Cleaning
Before you start cleaning, it’s best to gather the right tools and supplies.
Basic Cleaning Supplies
- Soft microfiber cloths or sponges(to avoid scratching)
- Mild dish soap or neutral detergent
- Warm water
- Old toothbrush or small bottle brush
- Soft towel for drying
For Deeper Cleaning
- White vinegar or baking soda (for tougher stains)
- A soft-bristle brush (for unclogging the nozzle)
Optional
- Stainless steel cleaner or polish for extra shine
Step-by-Step Guide to Cleaning Your Metal Soap Dispenser
Step 1: Empty the Dispenser
Before you start cleaning, always empty the dispenser. This prevents soap from mixing with your cleaning solution.
You can pour the leftover soap into a clean container to reuse later or toss it if it’s been sitting there for too long.
Step 2: Disassemble the Parts
Next, take the dispenser apart.
Unscrew the pump head, straw, nozzle, and other removable components. Place each part carefully on a towel or cloth.
If the pump feels stuck, don’t force it. Soap can dry and harden over time, making it hard to twist open. In that case, soak the entire pump section in warm water for about 5–10 minutes to loosen it up.

Step 3: Clean the Exterior and Interior
Mix a bit of mild dish soap with warm water in a bowl.
Dip a soft microfiber cloth in the mixture and gently wipe the outside of the dispenser. This helps remove fingerprints, stains, and smudges without scratching the surface. Avoid soaking the entire dispenser in water, because too much moisture can damage internal parts or seals over time.
Now clean the inside. First, fill the bottle halfway with your warm, soapy mixture. And cover the opening and shake it for a few seconds to loosen grime or residue inside. Use a bottle brush to reach the bottom if needed. Then rinse thoroughly until no soap remains. Finally, wipe the outside again with a damp cloth to remove any remaining spots or dried soap.
Step 4: Rinse the Bottle Thoroughly
Rinse the bottle under warm running water. Make sure all traces of detergent and residue are gone.
A clean rinse prevents leftover soap or cleaning solution from mixing with your next refill.
Step 5: Use White Vinegar for Tough Stains
If you notice stubborn spots or streaks, white vinegar is your best friend.
Mix equal parts vinegar and water in a spray bottle and lightly mist the stainless steel surface. Wipe with a soft cloth, moving along the grain of the metal. This helps you achieve a streak-free shine.
For water stains or hardened soap residue, let the vinegar solution sit for a few minutes before wiping. You can also use a stainless steel cleaner made specifically for soap dispensers if you prefer a professional polish.
Step 6: Clean the Nozzle and Pump
The nozzle and pump are the heart of your dispenser. Over time, these parts collect dried soap and can easily get clogged.
Here’s how to clean them:
- Fill a small bowl with warm water. Add a few drops of dish soap or a splash of vinegar.
- Submerge the pump and nozzle in the water for about 10 minutes.
- Use a soft toothbrush or small cleaning brush to scrub inside the nozzle and around tiny holes where soap comes out.
- Pump the soapy water through the mechanism several times to flush out any trapped residue.
- Rinse the parts thoroughly under warm running water.
If you’re dealing with a stubborn clog, try soaking the pump overnight in a mix of one part vinegar and one part warm water. This will dissolve hardened soap and restore smooth flow.
Step 7: Sanitize (Optional but Recommended)
For an extra-clean finish—especially if your dispenser is used in a public space or kitchen—sanitize it.
Mix one tablespoon of bleach with a quart of water. Fill the dispenser halfway with this solution and pump it a few times so the liquid runs through the nozzle. Let it sit for 5–10 minutes, then rinse thoroughly with clean water.
Prefer a gentler method? White vinegar works just as well for natural sanitizing.
Step 8: Dry and Reassemble
Make sure all the parts are completely dry before putting them back together. You can air-dry them or use a clean, soft towel.
Even a small amount of leftover moisture can lead to rust or bacterial growth, so take a few extra minutes to ensure everything’s dry.
Once ready, reassemble the dispenser.
If you’re using foaming soap, mix one part soap with four or five parts water before refilling the bottle. This keeps the pump from clogging and helps the dispenser release a smooth, consistent foam.
Step 9: Polish the Stainless Steel Surface
Finish with a little polish to bring back that brand-new shine.
Use a dry microfiber cloth to buff the stainless steel until it gleams. For extra protection, you can apply a drop of mineral oil or a stainless steel polish. Rub gently along the grain, not against it. This keeps fingerprints off and makes the surface easier to clean next time.
Maintenance Tips to Keep Your Soap Dispenser Looking New
Regular maintenance keeps your stainless steel soap dispenser not only functional but also stylish. Here are some long-term care tips:
1. Wipe It Weekly
Wipe the dispenser with a damp cloth at least once a week to prevent buildup. A quick clean takes less than a minute and keeps fingerprints at bay.
2. Avoid Harsh Cleaners
Stainless steel is durable, but it’s not indestructible.
Cleaners that contain bleach, ammonia, or strong acids can corrode or discolor stainless steel over time.
3. Use Distilled Water for Cleaning
If you live in an area with hard water, switch to distilled water when cleaning your dispenser. Hard water can leave mineral spots that are hard to remove later. Distilled water prevents buildup and keeps the metal surface sleek and spotless.
4. Don’t Overfill
It might be tempting to fill the bottle to the brim, but that can actually lead to leaks or poor pump performance.
Always leave a little space at the top, especially for foaming dispensers, which need air inside to create foam. Overfilling also can cause soap to leak or clog around the pump.
5. Use a Funnel When Refilling
This simple trick makes a big difference.
Using a small funnel prevents spills and helps you pour soap neatly into the reservoir. Any spilled soap on the metal surface can leave streaks or even brown marks over time. If spills happen, wipe them up right away with a damp microfiber cloth.

Guide to Repairing Broken or Malfunctioning Dispensers
Even with great care, dispensers sometimes break or stop working properly. Here’s how to solve common issues before deciding to replace the unit.
- Soap Dispenser Not Dispensing Soap
If your dispenser isn’t releasing soap, start by checking the basics. Make sure there’s enough soap in the bottle — sometimes the simplest fix is just a refill. Next, remove the pump and rinse it under warm water to clear out any dried soap or residue. If the pump still doesn’t move smoothly, soak it in warm water for a few minutes, then test it again. Check the hose and nozzle for blockages and straighten any kinks that might be restricting flow. - Soap Dispenser Leaking
A leak often points to a worn-out gasket or loose connection. Inspect the gasket (the rubber ring that seals the pump) for cracks or damage — if it’s old, replace it with a new one. Tighten any loose screws to prevent dripping around the joints. If the leak persists even after tightening and replacing parts, it might be time to consider a new dispenser. - Soap Dispenser Clogged
Clogs are common when using thick or old soap. Start by removing the dispenser and disassembling it. Soak all parts — especially the pump and nozzle — in warm, soapy water for about 10 minutes. Use a small brush or toothbrush to remove buildup. Rinse everything thoroughly and reassemble the dispenser once it’s completely clean and dry. - Broken Dispenser
Sometimes the dispenser is simply broken beyond repair. Cracked containers, damaged pumps, or compromised seals mean replacement is the best option. Trying to repair a badly damaged unit can be time-consuming and unreliable.

Keeping your stainless steel soap dispenser clean and well-maintained requires consistency. By following there tips, your dispenser can look as elegant as the day you bought it.
Specializing in wholesale custom drinkware, KingStar knows how to create dispensers with best performance. For further discussion, contact us today by sending us a message online or via email to sales@waterbottle.tech.