Contents
- 1. What makes Stanley cups so popular?
- 2. Are Stanley cups truly leak proof?
- 3. Are there any problems with Stanley cup gasket?
- 4. How to fix Stanley Cup Gasket Problems?
- 5. How to prevent future gasket problems for your cups?
- 6. What else you wanna know about Stanley cups? FAQs on Stanley cups usage and care
The Stanley cups are famous for being super durable and keeping your drinks at the perfect temperature for hours. But just like any other product, they do have their issues. One of the most common concerns users have is about whether or not they’re leak-proof, especially when it comes to the gasket on the Stanley cup. In this article, as the leading wholesale custom insulated cup manufacturer, we’ll dive into all the details about wholesale Stanley cups, their gasket problems and how you can fix them.
1. What makes Stanley cups so popular?
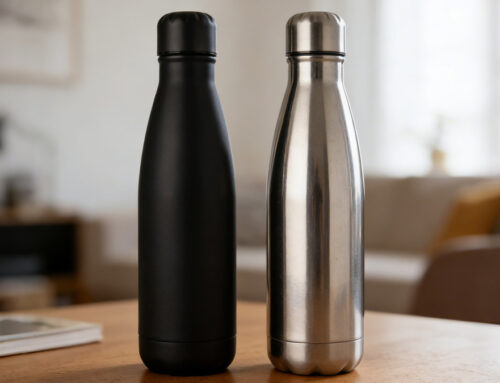
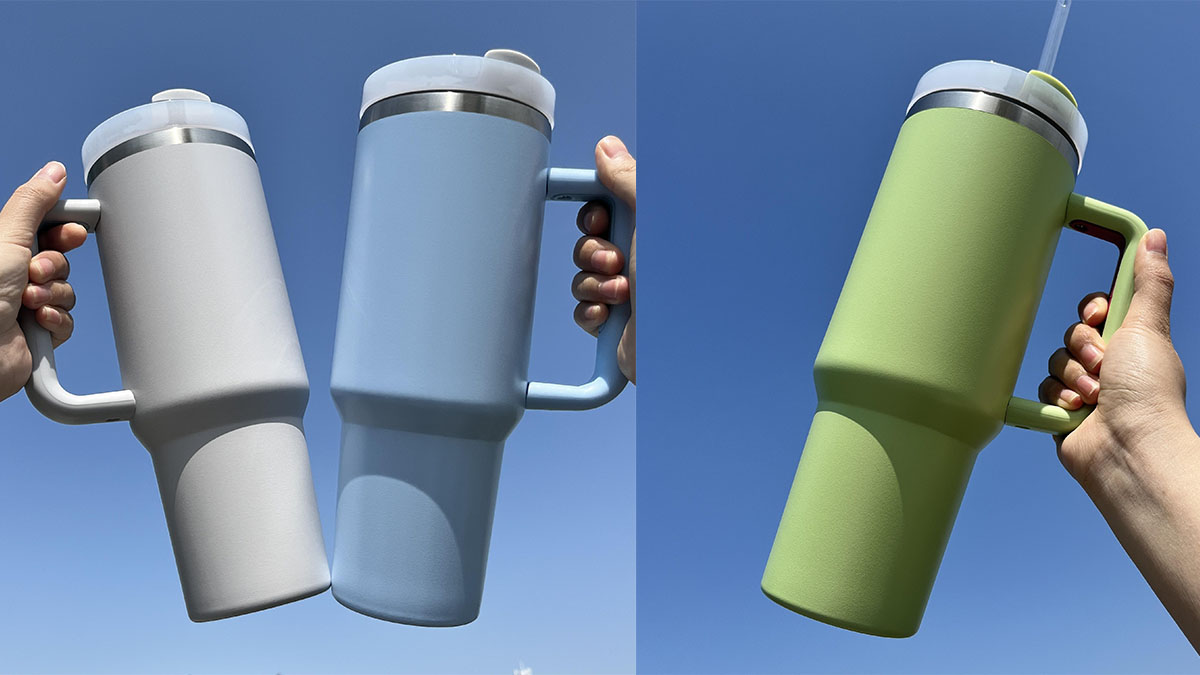
Stanley cups have gained a devoted following for many reasons, but what really sets them apart is their unbeatable durability, practicality, and cool design. The secret lies in the top-notch stainless steel they use, which can handle daily wear and tear without losing its shape or style. Plus, Stanley products’ advanced insulation technology keeps your drinks hot or cold for a whole day! So whether you’re at work, on an epic adventure, or anywhere else in between, you can enjoy your favorite beverages at just the right temperature.
A game-changing addition to the Stanley products that has seriously boosted its popularity is the original Adventure Quenchers series. This awesome lineup, launched as a testament to Stanley’s commitment to innovation and top-notch quality, perfectly embodies the brand’s dedication to meeting the needs of today’s adventurers. Stanley cups are famous for their tough build and exceptional ability to keep drinks hot or cold, making them an absolute must-have for outdoor enthusiasts and city commuters alike. With a variety of sizes available, from compact models for everyday use to larger options perfect for longer trips, there’s a Quencher that suits every occasion.
2. Are Stanley cups truly leak proof?

When it comes to Stanley cups being leak-proof, people often talk about what users expect versus how the products are actually designed and work. Stanley has a reputation for making tough and reliable drinkware, so there’s a high expectation that their cups won’t leak at all. But in reality, things are a bit more complicated, especially with their new Quencher H2.0 Flowstate Tumblers and the original Adventure Quenchers series.
Stanley’s new Quencher H2.0 Flowstate Tumblers are all about balancing convenience and functionality. They’re not completely leak-proof but Stanley is upfront about that. However, they’ve designed these wholesale stainless steel insulated tumblers to minimize the chances of leaks during regular use. One clever feature is the silicone guard around the straw, which does a great job of preventing splashes and significantly reduces the risk of big spills. It’s a practical solution for active people on-the-go, making sure that in most situations, your tumbler won’t spill.
However, if the cup gets knocked over or someone tries to put it in a bag, there might be some leakage. This warning emphasizes the importance of being careful when using the tumbler, especially in situations where you can’t guarantee it will stay upright.
3. Are there any problems with Stanley cup gasket?

The Stanley cup gasket plays a crucial role in ensuring the leak-proof integrity of Stanley cups. However, like any component subject to regular use and wear, the gasket may encounter several issues over time. Understanding these problems can help users maintain their cups more effectively and enjoy the leak-proof benefits Stanley promises.
- Wear and Tear: The most common issue with Stanley Cup gaskets is just regular wear and tear. Over time, the material of the gasket can stretch, warp, or get brittle, especially if it’s exposed to hot liquids or cleaning agents over and over again. This can make the seal weaker and might cause leaks.
- Improper Cleaning: Gaskets need to be cleaned carefully to keep them in good condition. Using harsh chemicals, abrasive scrubbers, or exposing them to extreme temperatures while washing can harm the gasket. These practices may speed up wear and reduce its effectiveness in sealing the cup.
- Misalignment or Improper Installation: After cleaning, if the gasket isn’t put back in correctly, it can cause misalignment. If the gasket isn’t properly seated, it won’t create a complete seal and will result in leaks. Making sure the cup gasket is evenly placed and securely fitted is crucial to prevent any leaks.
- Material Degradation: Over time, the materials used in the cup gasket can break down because of exposure to chemicals (like drinks or cleaning products) or simply from getting old. This breakdown can affect how stretchy the gasket is and its ability to make a really tight seal.
No matter what tumblers or water bottles you use, the gasket will face issues due to wear, cleaning practices, or improper use. Recognizing these potential problems and addressing them through proper care, maintenance, and replacement can help extend the life of the cup and maintain its leak-proof performance.
4. How to fix Stanley Cup Gasket Problems?

If you want to fix problems with a Stanley cup gasket, it’s actually pretty simple if you approach it step by step. To make sure your Stanley cup doesn’t leak, you just need to regularly take care of the gasket. It’s a really important part that keeps the cup in good shape and working properly. So here’s a detailed guide on how to effectively deal with common gasket issues.
Remove and Inspect the Gasket:
- Begin by carefully detaching the gasket from the cup’s lid. This step should be done gently to avoid causing any further damage to the gasket or the lid.
- Thoroughly inspect the gasket for any visible signs of wear, such as cracks, tears, or deformities. Also, check for any hard-to-remove debris that might compromise the seal.
Clean the Gasket and Lid:
- Use warm, soapy water to clean both the gasket and the lid. A soft cloth or sponge is recommended to avoid scratching or damaging the surfaces. This cleaning can help remove any oils, residues, or debris that might prevent a proper seal.
- Rinse both parts under clean water and allow them to air dry completely before reassembly. It’s crucial that no moisture is trapped during reassembly to prevent mold or mildew formation.
Once the gasket and lid are clean and dry , it’s time to reassemble. Carefully place the gasket back into the lid, ensuring it is evenly seated all around. This is perhaps the most critical step for ensuring leak-proof performance. If, upon inspection, the gasket shows significant damage or wear, it’s time for a replacement.
5. How to prevent future gasket problems for your cups?
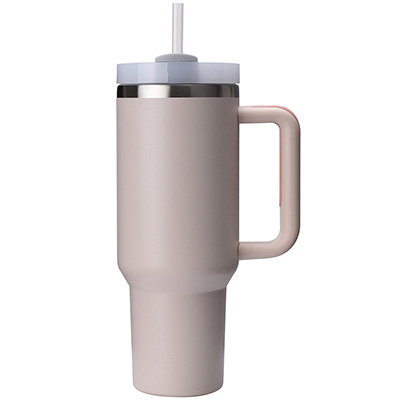
Custom Logo Design 40oz Tumbler with Handle Straw Lid S214098, unit price: USD 2.50~3.99
Send email to sales@waterbottle.tech or leave online message, you will get response within 24 hours.
To make sure your Stanley cup lasts a long time and doesn’t give you any trouble, it’s super important to take good care of the gasket. Follow these tips to keep it in top shape and avoid common problems:
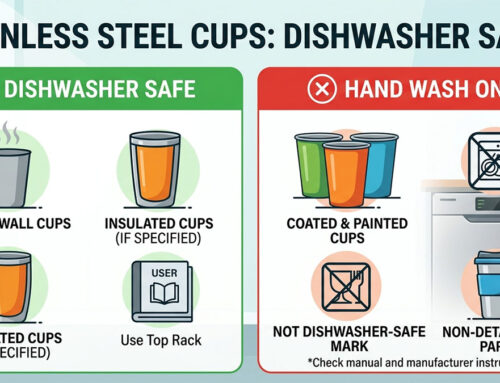
- Wash by Hand: Although it might be tempting to just throw your cup and its parts in the dishwasher for convenience, doing so can really mess up the gasket. It could wear out faster or even get all wonky. It’s actually better to hand wash it with warm, soapy water because that’s gentler and keeps the gasket in good shape.
- Avoid Harsh Chemicals: The importance of using mild detergents cannot be emphasized enough. Harsh chemicals or rough cleaners can damage the silicone material of the gasket over time, which will affect its flexibility and ability to seal properly. It is recommended to use gentle, environmentally-friendly soaps for cleaning in order to avoid any harm.
- Regular Checks: Make it a habit to regularly check the gasket for any signs of wear and tear, like cracks, stiffness, or changes in shape. Catching potential issues early on allows you to take prompt action, such as giving it a thorough clean or replacing it, to prevent leaks.
- Dry Thoroughly After Washing: Make sure both the gasket and the cup are completely dry before putting them back together. If there’s any moisture trapped, it can cause mold or mildew to grow, which not only poses health risks but can also damage the gasket material.
- Store Properly: When you’re not using your Stanley cup or other water bottles, make sure to take the lid off or just place it loosely on top. This way, air can circulate and prevent any unpleasant smells or moisture from building up, which could eventually damage the gasket.
- Mindful Use: Be careful how you handle and carry your Stanley cup. Try to avoid situations where the cup might get bumped or turned upside down too much, because constant pressure or impact can cause the gasket to wear out sooner than expected.
By implementing these preventative measures, you can significantly reduce the likelihood of gasket problems and enjoy a seamless, leak-proof experience with your cups for years to come. Regular care and attention to the gasket’s condition will not only preserve the functionality of your cup but also enhance your overall satisfaction with the product. Click and read more: Is Stainless Steel Water Bottle Great?
6. What else you wanna know about Stanley cups? FAQs on Stanley cups usage and care
Here we provide more questions about 40oz tumblers with handles and straw lids for your better reference:
6.1 Can I put my Stanley cup in the dishwasher?
While many Stanley cups are designed to be dishwasher-safe, it’s recommended to wash them by hand to preserve the integrity of the gasket and the cup’s insulation properties. Check the manufacturer’s guidance for your specific model.
6.2 How do I remove odors from my Stanley cup?
To remove odors, fill the cup with a mixture of baking soda and water, let it sit for several hours or overnight, then rinse thoroughly. For stubborn odors, a diluted vinegar solution can be effective. Rinse well to remove any vinegar taste.
6.3 Is it safe to store beverages in my Stanley cup overnight?
Yes, it is safe to store beverages in your Stanley cup overnight, thanks to its excellent insulation properties. However, to maintain freshness and prevent bacterial growth, avoid leaving perishable liquids, like milk, unrefrigerated for extended periods.
6.4 How often should I replace the gasket on my Stanley cups?
The lifespan of a gasket varies depending on usage and care. Regularly inspect it for wear and tear, and replace it if you notice any damage, deformation, or if your cup starts to leak. Generally, replacing the gasket once a year is a good practice for heavy users.
6.5 Can I put hot beverages in my Stanley cups?
Absolutely! Stanley cups are designed to handle hot beverages and will keep them hot for hours. Just be cautious when sealing and opening the cup with hot liquids to avoid pressure buildup and potential spills.
6.6 How do I ensure my Stanley cups remains leak-proof?
Ensure the gasket is always clean, undamaged, and properly seated. Avoid over-tightening the lid, as this can deform the gasket over time. Regular checks and maintenance are key to preserving the leak-proof quality of your cup.
6.6 What should I do if my Stanley cup starts leaking?
First, inspect the gasket for any signs of wear or improper placement. Clean the gasket and the lid thoroughly, and if the problem persists, consider replacing the gasket with a genuine Stanley part.
6.7 Can I freeze my Stanley cup to keep drinks cold longer?
It’s not recommended to freeze your Stanley cup. The expansion of liquids when frozen can damage the insulation properties of the cup or cause it to crack. Instead, use ice cubes or pre-chilled beverages to keep drinks cold.
If you want more information on bulk vacuum flasks or custom thermos tumblers, please leave on online message or send email to sales@waterbottle.tech, you will get reply within 24 hours.!

Specializing in custom manufacturing, quality control and marketing of vacuum-insulated drinkware and coolers.