Contents
- 1. How to get Started to paint your Hydro Flask?
- 2. How to choose the right paint to paint your Hydro Flask?
- 2.1 What are the different types to paint for Hydro Flask?
- 2.2 What are the considerations to paint for Hydro Flask?
- 3. How to apply paint to your Hydro Flask?
- 3.1 Which right technique should you choose: spray painting vs. brush painting?
- 3.2 What is the step-by-step guide to paint your Hydro Flask by spray?
- 3.3 What is the step-by-step guide to paint your Hydro Flask by brush painting?
- 4. How to add designs and patterns to your Hydro Flask?
- 5. How to dry and seal the paint?
- 6. How to maintain your painted Hydro Flask?
- 7. Conclusion
Hydro Flasks have become more than just functional water bottles; they have become a canvas for self-expression. Customizing Hydro Flasks through painting has gained immense popularity among individuals looking to add a personal touch to their everyday hydration companion. From vibrant designs to intricate patterns, painting your Hydro Flask allows you to showcase your creativity and create a truly unique water bottle that stands out from the crowd.
Also, painting your Hydro Flask can make it easier to identify your bottle in a sea of similar-looking water bottles, reducing the chances of it getting misplaced or accidentally taken by someone else. Last but not least, painting your Hydro Flask can provide a layer of protection, preventing scratches and minor dings from showing up on the surface. As a leading wholesale hydroflask manufacturer, we believe this article will take you to explore how to paint a unique and special Hydro Flask by yourself!
1. How to get started to paint your Hydro Flask?
Painting your Hydro Flask is an exciting and artistic endeavor that allows you to express your creativity and personalize your everyday accessory. As an old saying goes ‘to do a good job, one must first sharpen one’s tools’, good preparations will reduce your later task. Then let’s get started!
1.1 Gather the necessary supplies
Before you start your Hydro Flask painting journey, gather the following supplies:


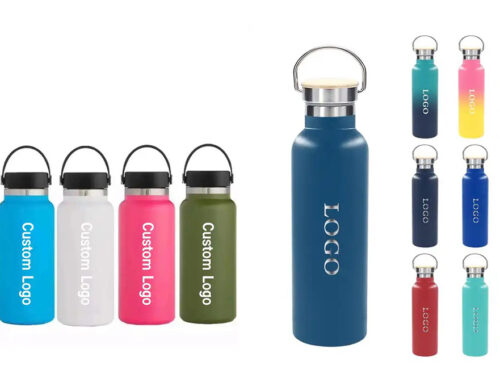
- Hydro Flask: Choose a Hydro Flask as the base for your artwork.
- Paint: Select acrylic or enamel-based paint suitable for metal surfaces.
- Brushes: Have a variety of brushes in different sizes to accommodate various painting techniques.
- Spray Paint: This can offer a quick and efficient way to paint a Hydro Flask. It allows for smooth and even coverage, ensuring a professional-looking finish.
- Resin spray: Resin spray can be used to enhance and protect the painted design on a Hydro Flask or any other painted surface.
- Masking tape: Use masking tape to protect specific areas or create clean lines.
- Sandpaper: Opt for fine-grit sandpaper to lightly sand the surface for better paint adhesion.
- Gloves or eyewear: These can provide essential protection. Gloves shield your hands from direct contact with paint and chemicals, preventing skin irritation and facilitating easier cleanup. Eyewear protects your eyes from paint splatters and airborne particles, ensuring safety and preventing potential eye injuries.
1.2 Prepare your workspace
Set up a well-ventilated and well-lit workspace to ensure a comfortable and conducive environment for painting. Lay down a drop cloth or old newspaper to protect your work surface from any accidental spills or splatters. Arrange your supplies within easy reach to streamline the painting process.
1.3 Remove any existing stickers or adhesive
Ensure that the surface of your Hydro Flask is clean and free from any stickers or adhesive residue. Gently peel off any existing stickers, taking care not to leave behind any sticky residue.
1.4 Sand the surface for better paint adhesion
To improve paint adhesion, lightly sand the surface of your Hydro Flask using fine-grit sandpaper. This step creates a slightly roughened surface that allows the paint to adhere more effectively. Be gentle while sanding to avoid damaging the underlying material.
1.5 Use masking tape to protect certain areas


If you want to create clean lines or protect specific areas from paint, use masking tape to cover around the rim and over the top. Besides, If you wanna keep the logo, please cover the type on it before cleaning. Apply the tape firmly, ensuring there are no gaps or loose edges that could lead to paint seepage. Finally, Use a knife to cut down unnecessary type( protect the brand and it’s not a rectangle anymore).

Click and read more: How Are Hydro Flask Made?
2. How to choose the right paint to paint your Hydro Flask?
Whether you want to personalize your trusty water bottle, express your creativity, or simply give it a fresh new look, selecting the right paint is crucial to achieving a vibrant and long-lasting result. With an array of options available, it can be overwhelming to determine which paint will adhere well to the flask’s surface and withstand the test of time. That’s why we’re here to provide you with expert advice and helpful tips that will enable you to make an informed decision.
2.1 What are the different types to paint for Hydro Flask?
When it comes to painting your Hydro Flask, two popular types of paint are acrylic and enamel.

- Acrylic paint: Acrylic paint is a versatile and popular medium for artists. It is made up of pigment particles suspended in an acrylic polymer emulsion, resulting in a fast-drying and water-soluble paint. Its advantages over oil paints include faster drying times, easy water-based clean-up, and compatibility with various surfaces. Acrylic paints come in a wide range of colors and consistencies, from transparent to opaque, and can be diluted or used directly from the tube. They adhere well to surfaces like canvas, paper, wood, metal, and plastic. Once dry, acrylic paint forms a flexible, durable, and water-resistant layer that allows for layering, glazing, and reworking. It can be mixed with mediums to achieve different effects. With its versatility, vibrant colors, and quick drying time, acrylic paint is a favored choice for artists in various art forms and styles.
- Enamel paint: Enamel paint is a durable and glossy type of paint that forms a hard, protective coating when dry. It is commonly oil-based or solvent-based and contains a high concentration of pigments, resulting in vibrant colors. Enamel paint is known for its excellent coverage and smooth finish, making it suitable for surfaces like metal, wood, ceramics, and certain plastics. It is often used in applications such as automotive finishes, appliances, furniture, and trim work. The glossy appearance of enamel paint adds a reflective quality that enhances the overall aesthetic. While enamel paint requires proper ventilation during application due to its strong odor and cleanup with paint thinners or solvents, its durability and attractive finish make it a popular choice for projects that require a long-lasting and visually appealing coating.
2.2 What are the considerations to paint for Hydro Flask?
Before diving into the world of Hydro Flask customization, there are several important considerations to keep in mind to ensure a successful and long-lasting paint job. In this part, we will delve into the key considerations one should take into account when painting a Hydro Flask. Whether you are an artist looking to showcase your creativity, a sports enthusiast wanting to display your team’s logo, or simply an individual desiring a personal touch on your flask, understanding these considerations will help you achieve the desired results.
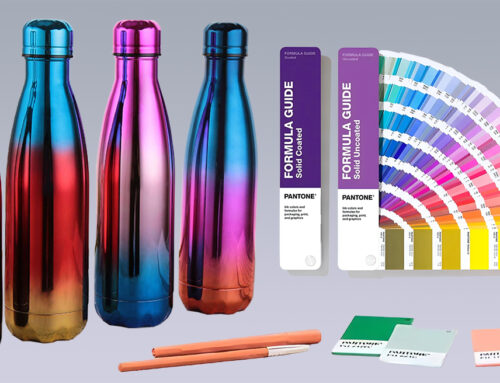
- Paint adhesion and durability: Ensure that the paint you choose is designed for metal surfaces and offers good adhesion. Look for paints specifically labeled as suitable for outdoor or industrial use, as they tend to be more durable. Consider factors such as resistance to water, UV rays, and general wear and tear to ensure your artwork stays vibrant for a longer period.
- Exploring various color options and finishes: Get creative with your color choices and consider the overall aesthetic you want to achieve. You can opt for a single color, a combination of complementary or contrasting colors, or even experiment with gradients or ombre effects. Additionally, consider finishes such as matte, glossy, metallic, or even glitter to add a touch of flair to your Hydro Flask.
3. How to apply paint to your Hydro Flask?
After getting everything clear and prepared, it’s time to start your Hydro Flask painting journey.
3.1 Which right technique should you choose: spray painting vs. brush painting
When it comes to painting a Hydro Flask, choosing the right technique can greatly impact the final result and the overall durability of the artwork. Two commonly used techniques for painting Hydro Flasks are spray painting and brush painting. Each technique has its own advantages and considerations, which we will explore further.

VS

| Pros | Cons |
|---|---|
| Uniform Coverage: Spray painting allows for a consistent application of paint over the entire surface of the flask, including hard-to-reach areas and contours. | Over spray: Spray painting can create a mist of paint particles settling on nearby surfaces. It is crucial to properly protect the surrounding area to avoid unwanted paint marks. |
| Quick Application: With spray painting, you can cover large areas in a relatively short amount of time, making it an efficient technique. | Ventilation: Spray painting produces airborne particles, so it is essential to work in a well-ventilated area or wear appropriate respiratory to protect yourself. |
| Smooth Finish: Spray painting often results in a smoother, more professional-looking finish compared to brush painting, especially when using high-quality spray paints. | Skill and Control: Spray painting requires a certain level of skill and control to achieve the desired result. Proper technique are important to avoid drips, uneven coverage, or over-saturation. |
| Pros | Cons |
|---|---|
| Detail and Precision: Brush painting allows for greater control and precision, making it an ideal technique for intricate designs, fine lines, and small details. | Brush Strokes: Depending on the type of brush used and the artist’s technique, brush strokes may be visible in the final result. It may not be suitable for a smooth, seamless finish. |
| Layering and Blending: With brush painting, you can easily layer and blend colors, creating depth and complexity in your artwork. | Time-consuming: Brush painting typically takes longer compared to spray painting, especially for covering large areas. This needs you to pay more attention and patience. |
| Accessibility: Brush painting is a technique that requires minimal equipment, making it more accessible for beginners or those without access to spray painting equipment. | Brush Selection: Choosing the right type and quality of brushes is crucial for achieving precise lines and avoiding shedding bristles that could mar the finish also matters. |
Ultimately, the choice between spray painting and brush painting for a Hydro Flask depends on your desired outcome, the complexity of the design, your skill level, and the tools and materials available to you. You may even choose to combine both techniques, using spray painting for base coats and large areas, and brush painting for finer details and touch-ups. Experimentation and practice will help you determine which technique works best for your artistic vision and skill set.
3.2 What is the step-by-step guide to paint your Hydro Flask by spray painting?
Price: USD2.99-4.99
- Shake the spray paint can vigorously for a few minutes to ensure proper mixing of the paint.
- Hold the can approximately 6 to 8 inches away from the Hydro Flask and begin spraying in smooth, sweeping motions.
- Apply multiple thin coats, allowing each coat to dry completely before applying the next. This helps prevent drips or pooling of paint.
- Ensure that you cover the entire surface evenly and consistently.
- Allow the final coat to dry according to the manufacturer’s instructions before proceeding to the next steps.
3.3 What is the step-by-step guide to paint your Hydro Flask by brush painting?
- Start by pouring a small amount of paint into a palette or disposable container.
- Sketch a pattern you like on your bottle surface with a pencil (easy for your modification).
- Choose the color and dip your brush into the paint, ensuring that it is evenly coated but not overloaded.
- Apply the paint to the surface of your Hydro Flask using smooth brushstrokes. If necessary, apply multiple coats to achieve the desired opacity or color intensity.
- Take your time and pay attention to detail, especially when working on intricate designs or patterns.
- Allow the paint to dry completely between each coat.
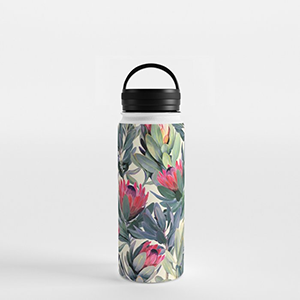
4. How to add designs and patterns to your Hydro Flask?
We know that it maybe not easy for some of you to draw on Hydro Flasks, so here we’d like to show you other easier ways to add your ideal patterns on the bottles.
4.1 Create stencils for intricate designs
If you want to add intricate designs or patterns to your Hydro Flask, consider using stencils. You can either purchase pre-made stencils or create your own by cutting out shapes or designs from sturdy materials such as cardboard or acetate sheets. Secure the stencil firmly against the surface of your Hydro Flask using masking tape, and then apply paint using a brush or spray.
4.2 Use painters tape for clean lines and geometric patterns
Painters tape is a handy tool for creating clean lines or geometric patterns on your Hydro Flask. Apply the tape firmly in the desired pattern or shape, ensuring it adheres properly to the surface. Paint over the tape, making sure to cover the edges, and allow the paint to dry before carefully removing the tape to reveal the crisp lines or shapes.
4.3 Explore freehand painting techniques
For those who prefer a more artistic and spontaneous approach, freehand painting allows you to let your creativity flow. Use your brushes, paint, and imagination to create unique designs, patterns, or images directly onto your Hydro Flask. But before creating, remember to draw a sketch line with your pencil on the Hydro Flask. Then you just need to fill different colors within the line.Once everything is done, you can embrace the imperfections and embrace the beauty of your hand-painted artwork.
5. How to dry and seal the paint?
Once your painting is done, stop touching it at once! We have one important tip left, that is, dry and seal the paint. Then you can follow us to get this inevitable step finished.
- Allowing sufficient drying time: After completing the painting process, it is crucial to allow the paint to dry thoroughly. Follow the manufacturer’s instructions for the recommended drying time. Avoid touching or handling the painted surface until it is fully cured to prevent smudging or smearing.
- Applying a clear coat for protection: To protect your artwork and enhance its durability, apply a clear coat over the painted surface. Choose a clear coat specifically designed for metal surfaces and follow the application instructions provided. The clear coat adds a protective layer that helps safeguard your paint from scratches, fading, and general wear and tear.
- Curing the paint for long-lasting results: After applying the clear coat, it is essential to allow it to cure properly. Curing refers to the process of letting the paint and clear coat bond and harden over time. Follow the manufacturer’s instructions for the recommended curing time, which is typically a few days. During this period, avoid exposing your Hydro Flask to extreme temperatures or harsh conditions that could compromise the curing process.
6. How to maintain your painted Hydro Flask?
It is important to maintain your painted Hydro Flask to ensure the longevity and quality of the design. By properly maintaining the paintwork, you can enjoy a vibrant and personalized flask for an extended period.
- Proper cleaning techniques to preserve the paint: To maintain the integrity of your painted Hydro Flask, it’s important to clean it properly. Hand wash your Hydro Flask using mild dish soap and lukewarm water. Avoid using abrasive cleaners or scrub brushes that could damage the painted surface. Gently pat dry with a soft cloth or let it air dry.
- Preventing scratches and chips: Although the clear coat provides some protection, it’s still important to handle your painted Hydro Flask with care to avoid scratches or chips. Avoid placing it in situations where it could be knocked or banged against hard surfaces. Additionally, consider storing your Hydro Flask in a protective sleeve or pouch when not in use to further minimize the risk of damage.
- Refreshing the paint over time: Over time, the paint on your Hydro Flask may experience some wear and tear. If you notice any fading, scratches, or chips, consider refreshing the paint to keep your water bottle looking its best. You can repaint the entire surface or touch up specific areas as needed, following the same steps outlined in this guide.
Regular maintenance helps prevent the paint from chipping, scratching, or fading due to everyday wear and tear. By dedicating a little effort to maintenance, you can ensure that your painted Hydro Flask remains a cherished accessory that reflects your personal style and adds a touch of individuality to your everyday life.
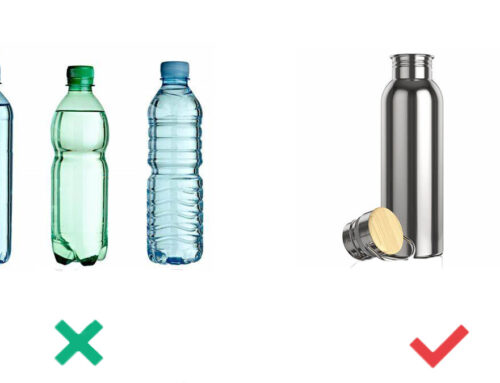
Hydro Flask is not square metal water bottle, so it is not difficult to get this done.
7. Conclusion
Painting your Hydro Flask opens up a world of creativity and self-expression. By following the steps outlined in this guide and exploring various techniques and designs, you can transform your Hydro Flask into a personalized masterpiece. Whether you opt for vibrant colors, intricate patterns, or unique designs, painting your Hydro Flask allows you to showcase your individuality and enjoy a one-of-a-kind water bottle that truly stands out. So, gather your supplies, unleash your artistic spirit, and let the painting process begin.

Specializing in custom manufacturing, quality control and marketing of vacuum-insulated drinkware and coolers.